

Google apps (Gapps)
If you are a Python developer or if you want to develop and publish a google workspace add-ons developped with Python using the Gapps (Google Apps) module, this document is for you.
Here are the different points I'll cover in this tutorial:
1. Make sure your application complies with google guidelines
Here, we'll assume that our application is more or less complete and that we're at the publishing stage. The first thing is to make sure that our application complies with Google's general guidelines. Here are the official google guidelines. You need to make sure that all links work correctly, that there are no errors, etc...
2. Creating a standard project on the Google Cloud Platform
Google workspace add-ons must be linked to a google cloud project. A google cloud project has a unique ID, follow these step-by-step instructions to create a google cloud project with a unique ID:
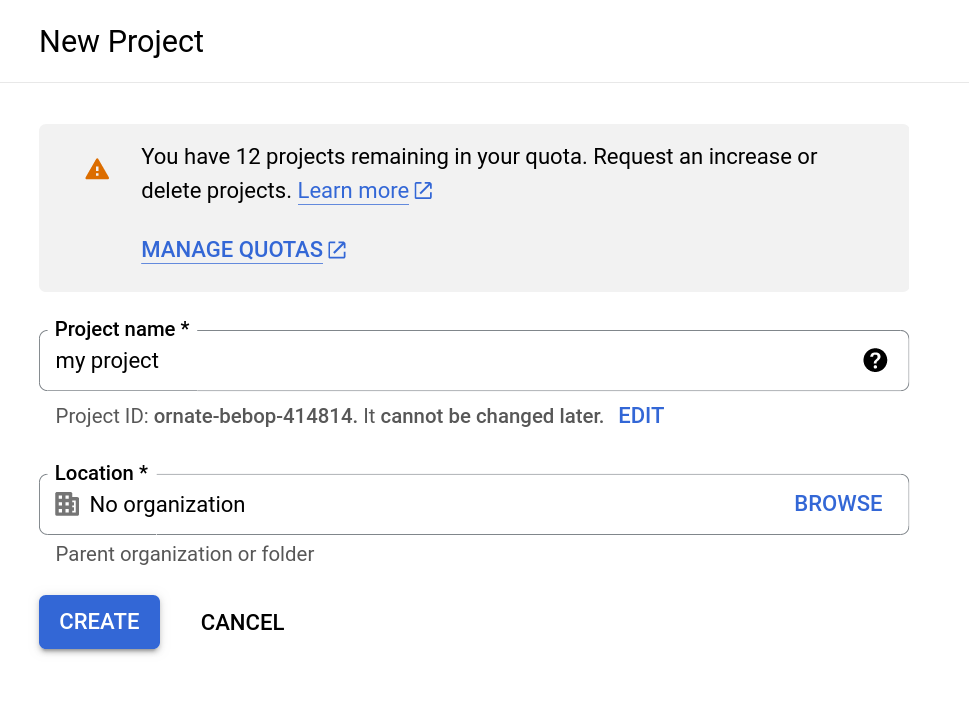
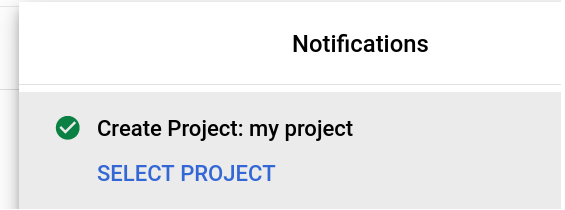
2.1 Log in to your Google Cloud Console(GCC) account and create a google cloud project.
.jpg?alt=media&token=8c0d072b-f7e9-4359-bdac-a8fe5b44f4b3)
.png?alt=media&token=61ae20ec-6a40-47a8-92f8-84ec73c6bf62)
2.2 Fill in this form with the required information, then click on create
3. Configure Oauth consent screen
As your add-on will be linked to a Google product, the user must be informed and agree to the add-on having access to some of this data. The Oauth consent screen lets the user know what data the add-on will access if he or she authorizes it. Here's how to set up the consent screen.
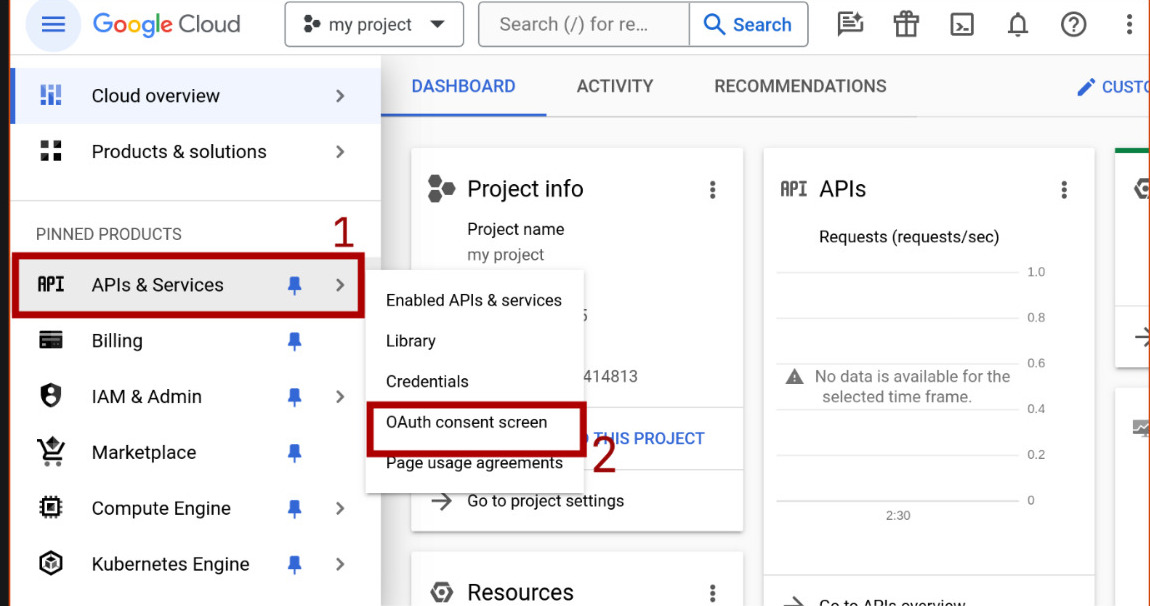
3.1 On your project overview page, click on APIs and Services and then on Oauth consent screen.
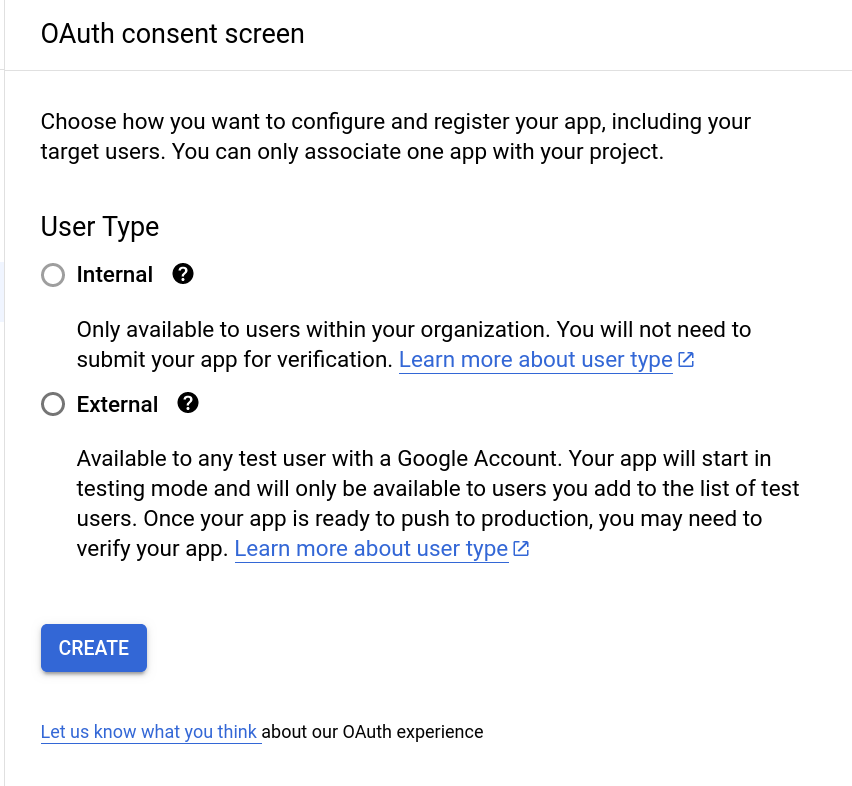
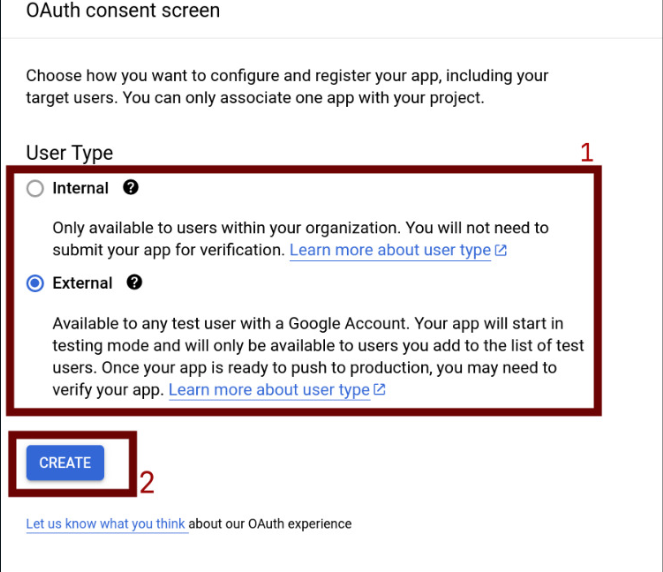
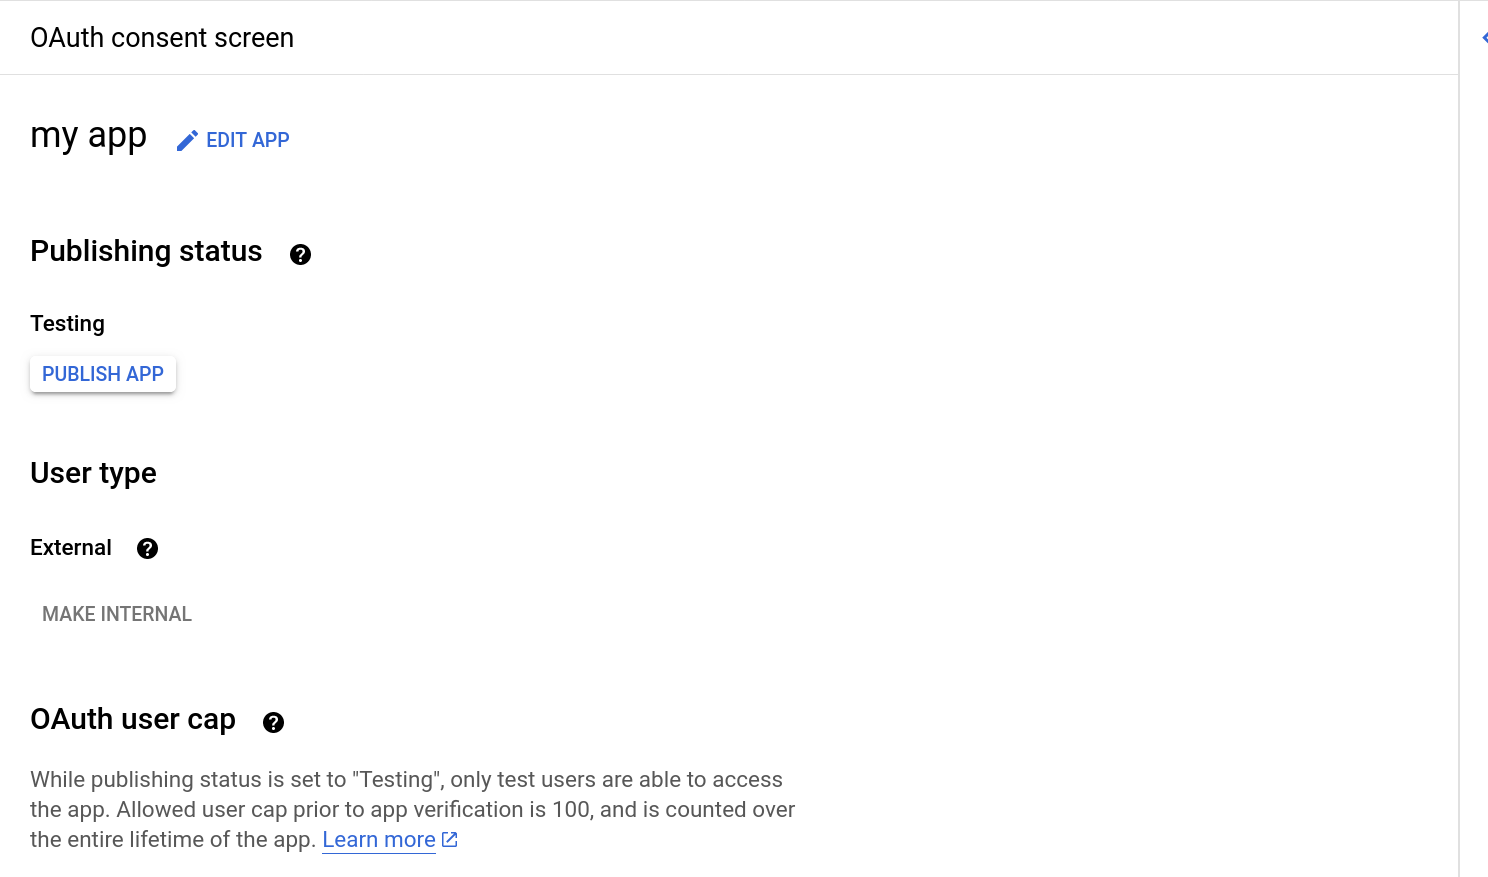
3.2 Choose whether your application will be Internal (private) or External (public)
If you want your application to be private, you can choose internal, limited to your organization. But if you want it to be public, you can choose external, so that anyone can install it.
3.3 Once you've chosen the user type, click on create.
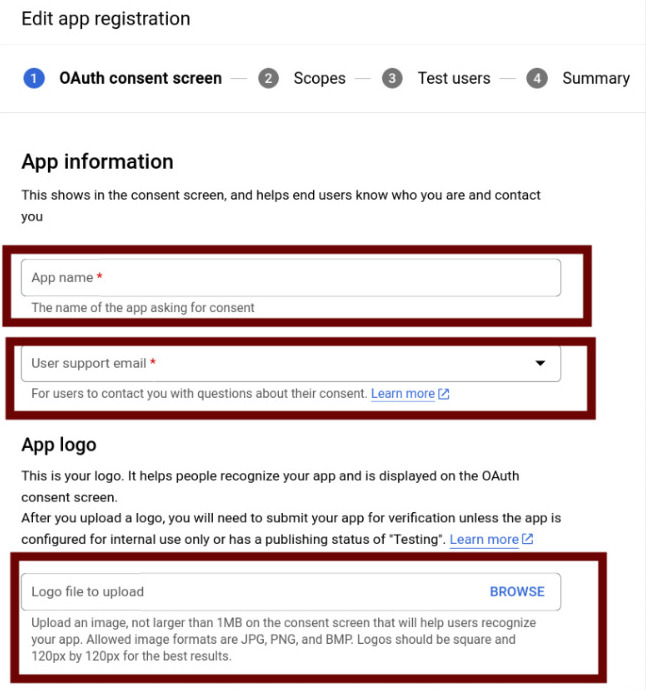
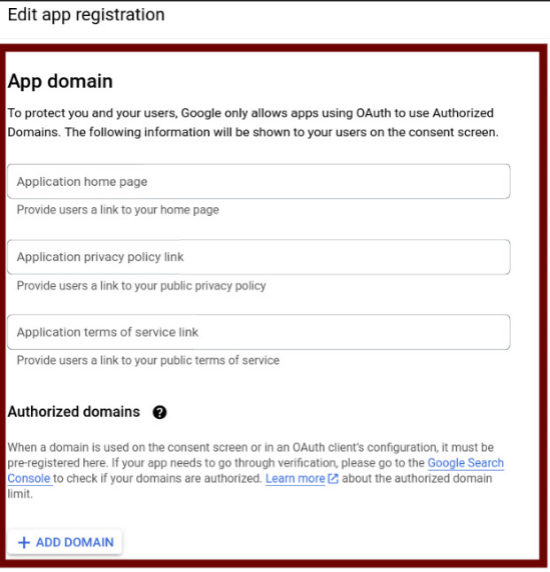
3.4 App registration
For this step, we will provide information about our application, such as the application name, the developer's e-mail address, app logo etc...
Note: fields marked with a red star * are mandatory.
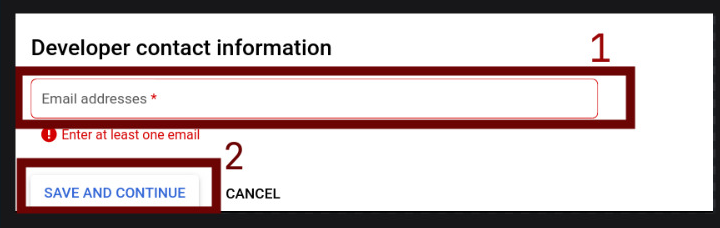
Enter the developer's contact details, such as e-mail address, then click on "SAVE AND CONTINUE" to move on to the second step.
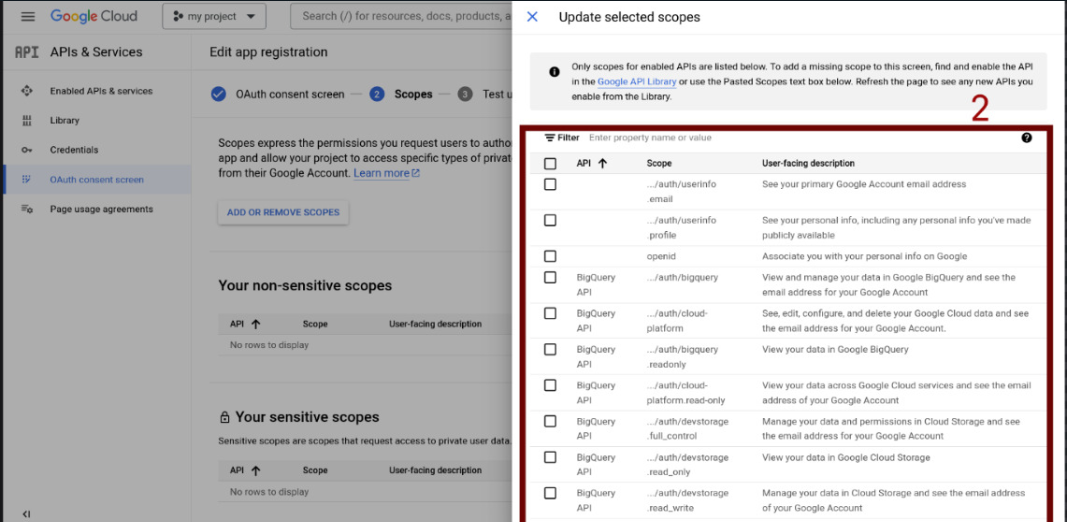
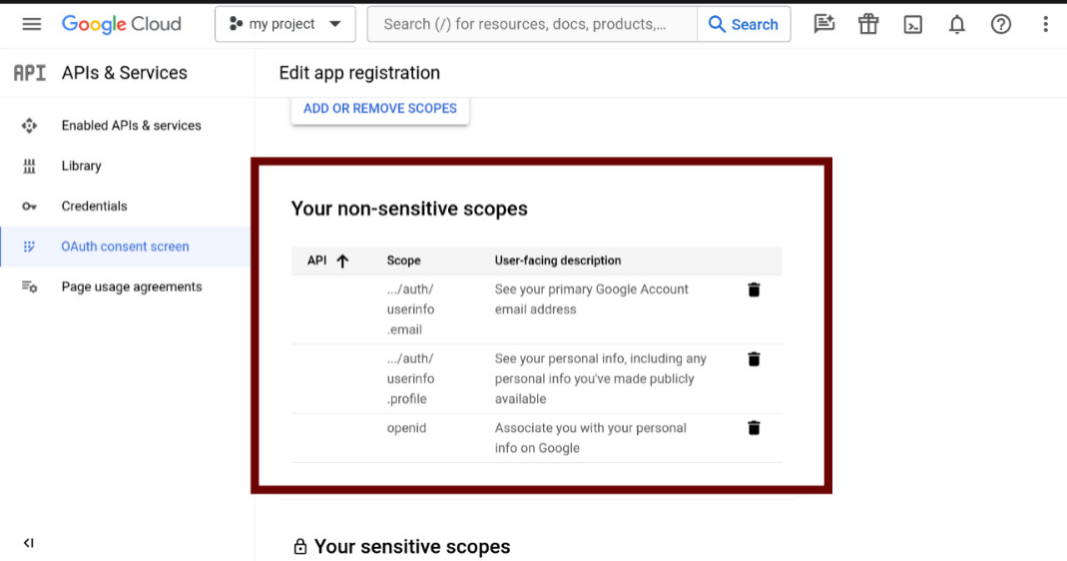
3.5 Scope filling
This step is the most important: it's here that we'll fill in the scopes or access levels for our add-ons. Scopes are permissions that users grant to our applications. We have three types of scoop (sensitive, non-sensitive and restricted). Here, we'll only fill in the non-sensitive scoops:
Click on the ADD OR REMOVE SCOPES button to add and/or remove scopes. Here we'll add scoops:

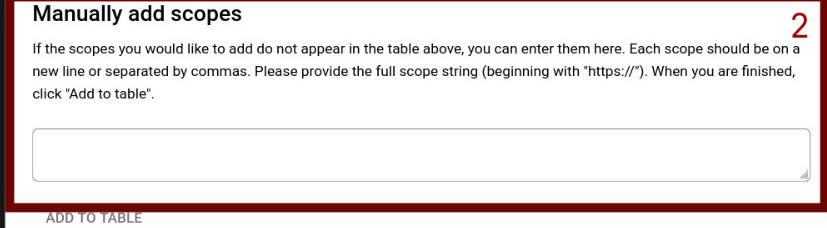
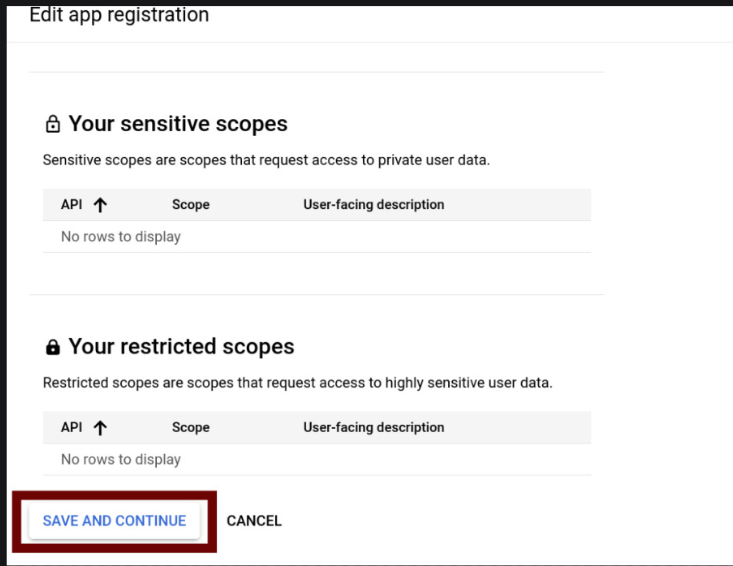
after selecting and / or filling in the scopes manually, click on the update button to update.

After updating the application fields, scroll down and click on the SAVE AND CONTINUE button to move on to the next step.
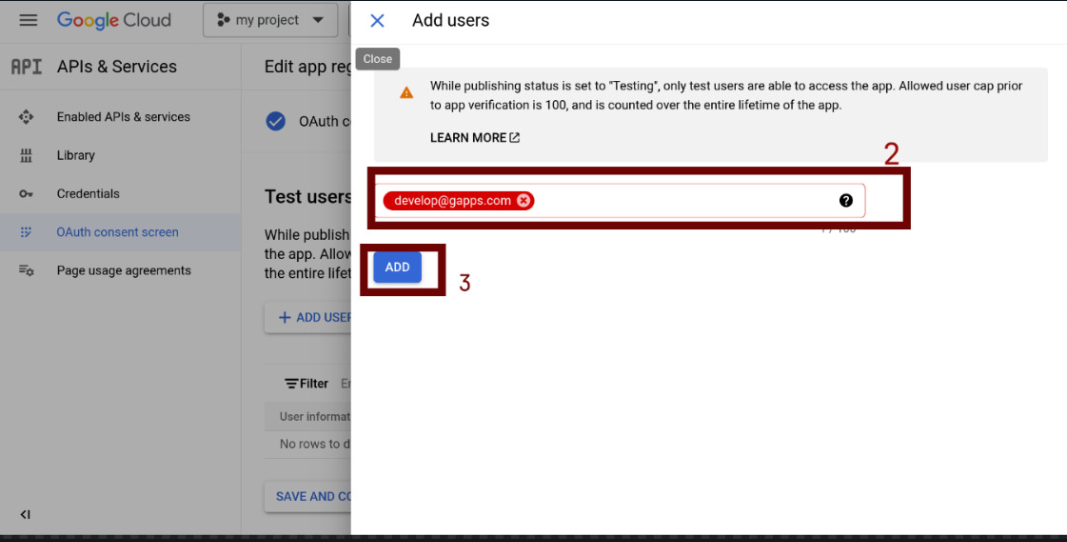
3.6 Add testers
This step involves adding the users who will be testing the application. This user must have a Google account. The aim of the test is to ensure that the application works as expected.
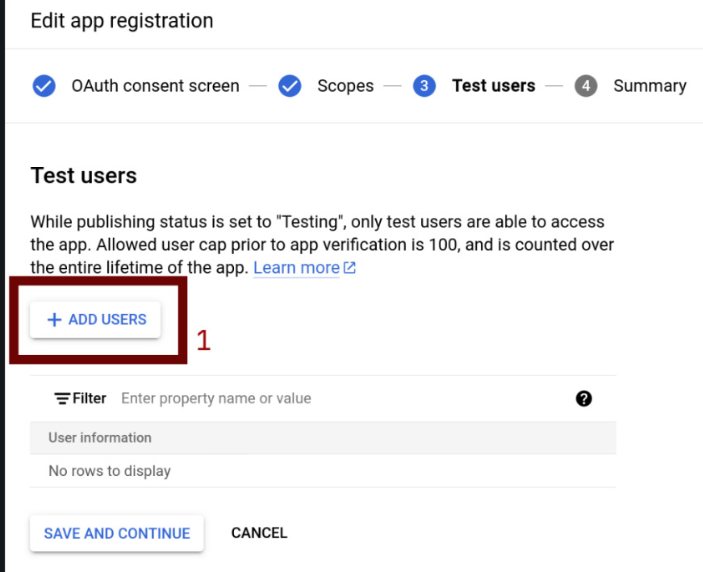

When you've finished adding all your testers, click on the SAVE AND CONTINUE button to move on to the final step
3.7 This step is just a summary of all the other steps. If you wish to modify any information, click on the EDIT button.

If all is well and you have no changes to make, click on the BACK TO DASHBOARD button to go to the DASHBOARD.
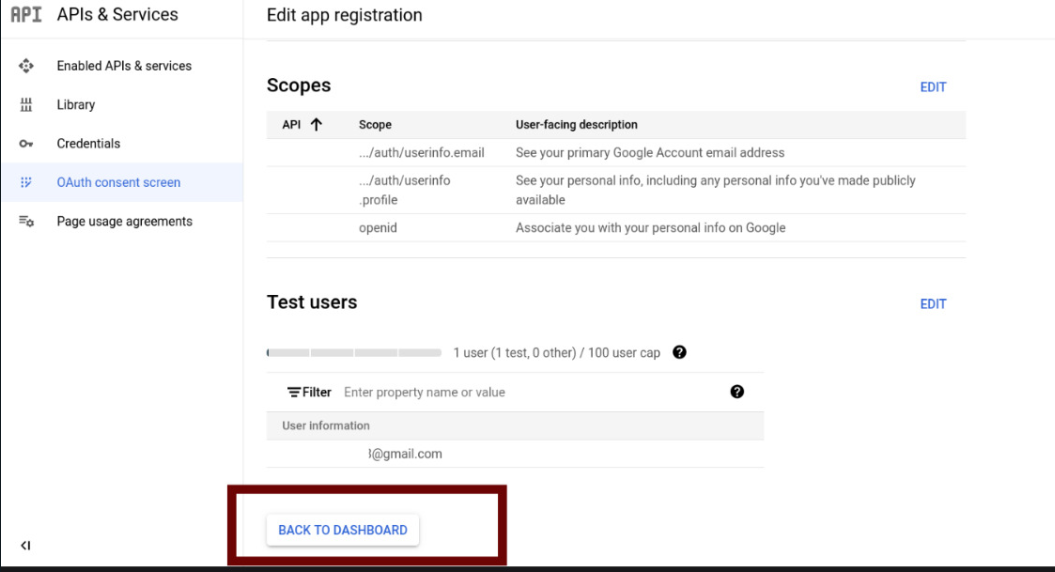
At this stage, don't click on "PUBLISH APP" yet. Even if you click this button, your application will not actually be published on the marketplace.
For more information, read this article: Completing the oAuth consent screen
4. Create a Google Apps (Gapps) project
Now that everything is set up on the google platform, we'll create an example of add-ons with python using the gapps module.
4.1 First of all, we need to prepare our development environment.
Installation of gapps modules with pip
Note: Make sure you already havePython3;FastApiorFlask
The release version
if you want to install the release version of gapps you can use one of these commands
pip install gapps
OR
python3 -m pip install gapps
you can see the installed version of gapps by using one of these following commands lines:
pip show gapps
OR
python3 -m pip show gapps
Installation of the dev version.
pip install -e git+https://github.com/skoudoro/gapps.git@main#egg=gapps
GitHub repository https://github.com/skoudoro/gapps.git
Now that gapps is installed, we can start building our sample add-ons for the Google workspace using gapps.
4.1 Building a sample of google workspace add-ons in python using Gapps
Before starting the actual construction, we'll look at a few points:
CardService
To build and configure the user interface for our google workspace Add-ons, we're going to use the CardService, a service that lets us configure and build card and widget components and behaviors for a user interface. The UI structures you build with this service are automatically available for desktop and mobile devices, so you don't need to develop separate UIs for these two types of device.
CardService contains a series of classes and methods that you can consult here for more details.
Classes and Methods reference:https://developers.google.com/apps-script/reference/card-service
Coding style
You can choose between AppScript style or Pythonic styles.
AppScrit style
from gapps import CardService

def create_cat_card(text):
    # Use the "Cat as a service" API to get the cat image. Add a "time" URL
    # parameter to act as a cache buster.
    now = datetime.now()
    caption = text.replace('/', ' ')
    imageUrl = f'https://cataas.com/cat/says/{caption}?time={now.timestamp()}'

    image = CardService.newImage() \
        .setImageUrl(imageUrl)  \
        .setAltText('Meow')

    # Create a button that changes the cat image when pressed.
    # Note: Action parameter keys and values must be strings.
    action = CardService.newAction()  \
        .setFunctionName('on_change_cat') \
        .setParameters({'text': text, 'is_homepage': str(is_homepage)})

    button = CardService.newTextButton()  \
        .setText('Change cat')  \
        .setOnClickAction(action)  \
        .setTextButtonStyle(CardService.TextButtonStyle.FILLED)

    buttonSet = CardService.newButtonSet()  \
        .addButton(button)

    # Assemble the widgets and return the card.
    section = CardService.newCardSection()  \
        .addWidget(image)  \
        .addWidget(buttonSet)

    card = CardService.newCardBuilder()  \
        .addSection(section)

    return card.build()
Pythonic style
from gapps import CardService

def create_cat_card(text):
    # Use the "Cat as a service" API to get the cat image. Add a "time" URL
    # parameter to act as a cache buster.
    now = datetime.now()
    caption = text.replace('/', ' ')
    imageUrl = f'https://cataas.com/cat/says/{caption}?time={now.timestamp()}'

    image = CardService.Image(image_url=imageUrl, alt_text='Meow')
    action = CardService.Action(
        function_name='on_change_cat',
        parameters={'text': text, 'is_homepage': str(is_homepage)})
    button = CardService.TextButton(
        text='Change cat', action=action,
        text_button_style=CardService.TextButtonStyle.FILLED)
    button_set = CardService.ButtonSet(button=button)
    section = CardService.CardSection(widget=[image, button_set])

    card = CardService.CardBuilder(section=section)

    return card.build()
NOTE: In this tutorial, we'll build our Add-ans example in AppScript style. You can choose the style you're most comfortable with
With that said, we're going to build a google workspace add-ons that will allow us to display a fictitious user's profile. We'll be using Gmail, but you can use any Google workspace product - the process is the same.
The code Source:
we need to create a github repository for project. I've created one here: https://github.com/WassCodeur/test_gapps
The source code of our add-ons can be found in the file simple_demo.py
""" To run this example: uvicorn simple_demo:app --reload --port 8080 """

from gapps import CardService
from gapps.cardservice import models
from gapps.cardservice.utilities import decode_email

from fastapi import FastAPI
from fastapi.responses import JSONResponse


app = FastAPI(title="Cards example")


@app.get("/")
async def root():
    return {"message": "Welcome to Simple Demo App example"}


@app.post("/homepage", response_class=JSONResponse)
async def homepage(gevent: models.GEvent):
    email = decode_email(gevent.authorizationEventObject.userIdToken)

    page = build_cards(email)
    return page


def build_cards(email):
    cardSection1DecoratedText1Icon1 = CardService.newIconImage()  \
        .setIconUrl('https://koolinus.files.wordpress.com/2019/03/avataaars-e28093-koolinus-1-12mar2019.png')  # noqa: E501
    cardSection1DecoratedText1 = CardService.newDecoratedText()  \
        .setText('John Doe')  \
        .setBottomLabel(email)  \
        .setStartIcon(cardSection1DecoratedText1Icon1)

    cardSection1 = CardService.newCardSection()  \
        .setHeader('My Profile')  \
        .addWidget(cardSection1DecoratedText1)

    card = CardService.newCardBuilder()  \
        .addSection(cardSection1)  \
        .build()

    return card
Congratulations, we've just written the source code for our google Add-ons called My profile. Now we're going to host it and publish it on google workspace for testing.
5. Hosting the project
You have the choice of using any hosting company to host your project. Here I'm going to host the project on Vercel here's the link: https://vercel.com/ to their official site
To host on Vercel, follow these steps:
Requirements
You mainly need these three files in your application.
1- requirements.txt: This file will contain all your dependencies. Run: pip freeze > requirements.txt in your development environment to obtain this file.
2- Vercel.json : This file contains information for vercel to configure your runtime during deployment.
3- The entry point: the source code of the python project with the .py extension: This python file can be named differently, but it must contain the FastAPI application. In our case our source code is simple_demo.py
The file structure:
root_dir
  - simple_demo.py
  - requirements.txt
  - vercel.json
Vercel.json:
  {
"builds": [
    {
        "src": "simple_demo.py",
        "use": "@vercel/python"
    }
],
"routes": [
    {
        "src": "/(.*)",
        "dest": "simple_demo.py"
    }
]
}
If the structure of your application is different, modify build.src and routes.dest to point to the python file containing the root application.
Visit vercel and create an account if you don't already have one.
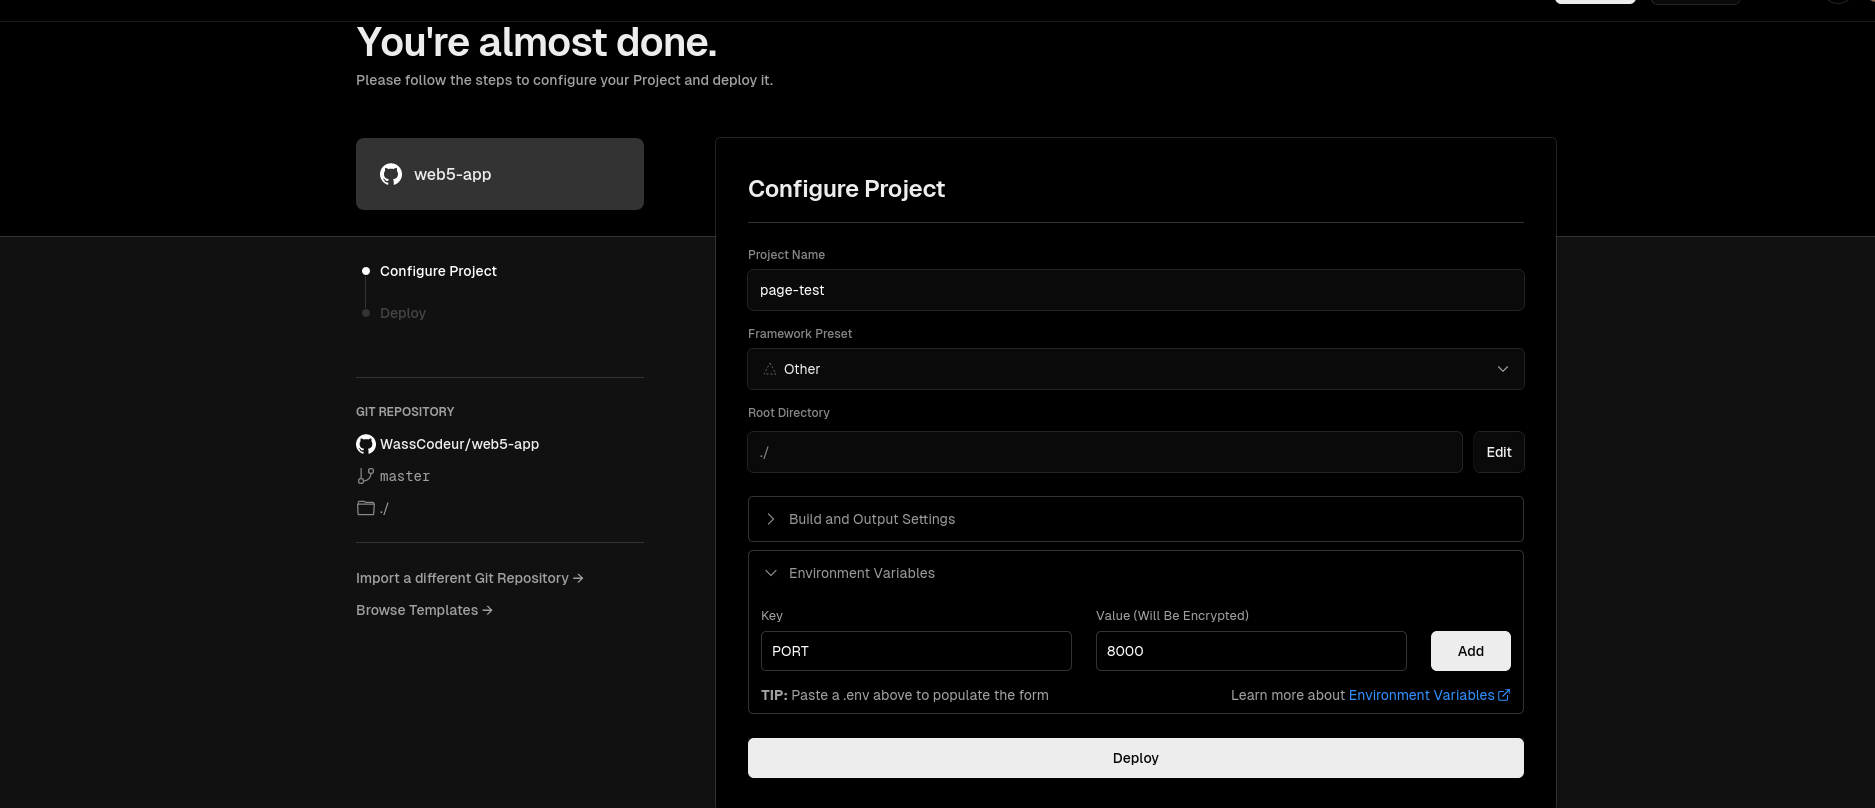
In addition, in the environment variables section, you may need to configure the port. Copy and paste PORT=8000 into the key field. If you have other environment variables that your application expects, such as database configuration, feel free to add them here too.
Then Click on deploy and in a few moments your API is up and running.

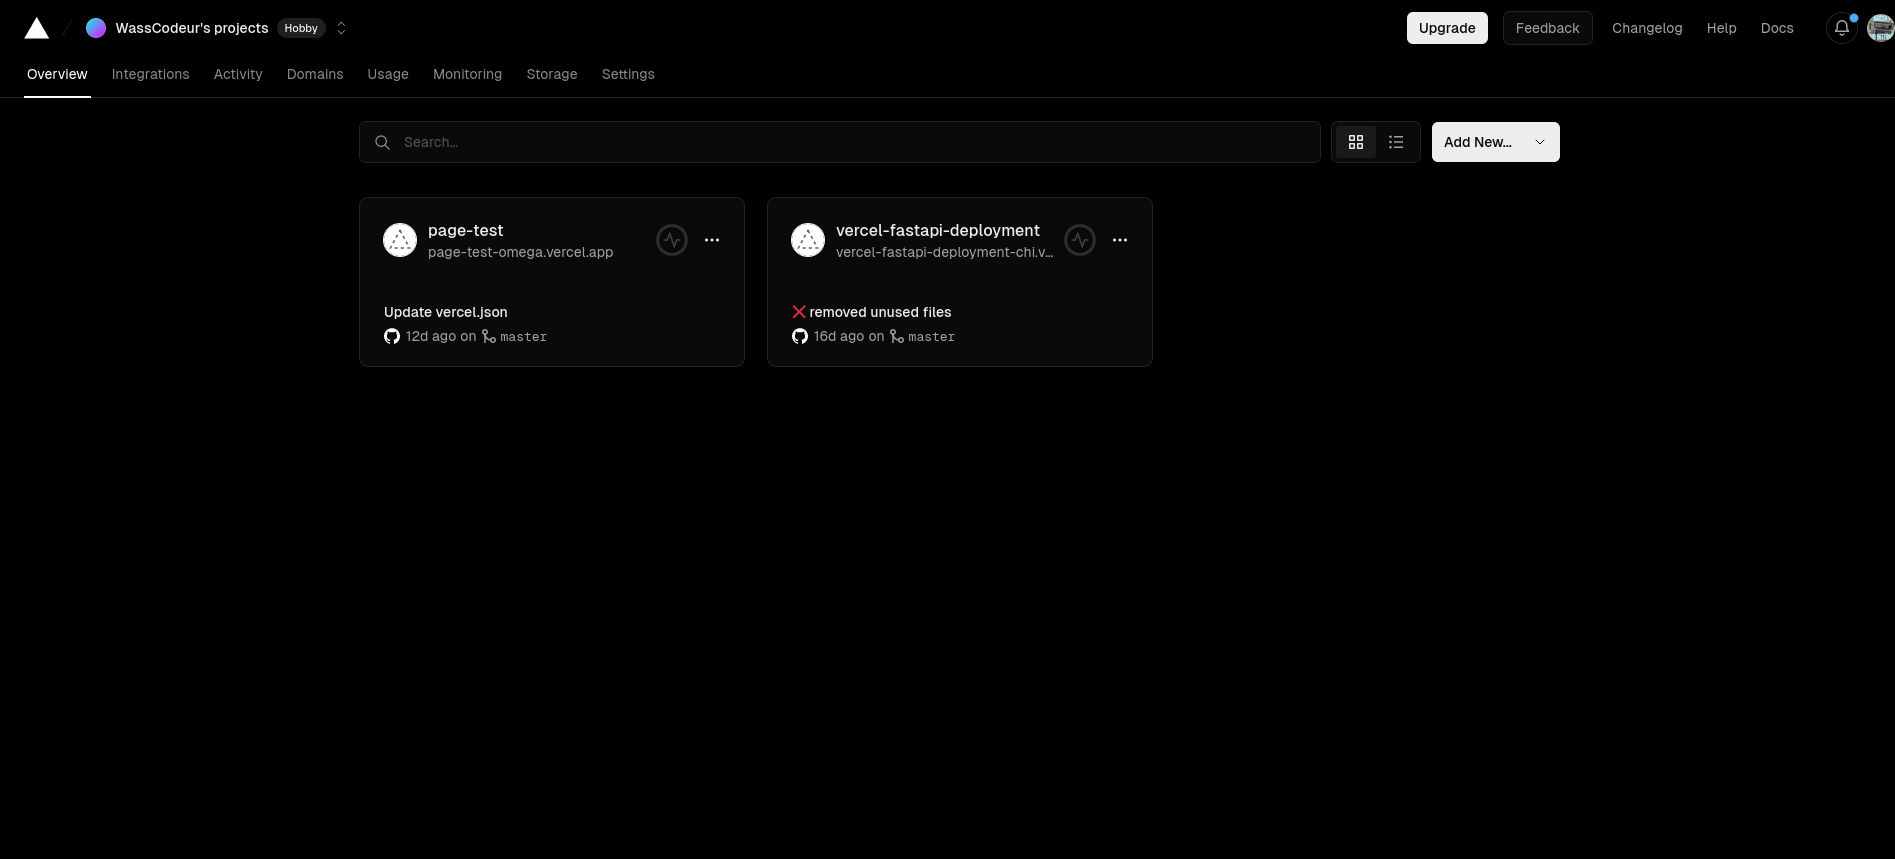
If all goes well, you'll have a page similar to mine.


Don't forget the domains I've framed, we'll be using them soon. To publish our add-ons on google workspace.Don't forget the domains I've framed, we'll be using them soon. To publish our add-ons on google workspace.
NB: your domains won't be the same.
6. Publishing the Add-ons google workspace for test
Congratulations on reaching the final stage.
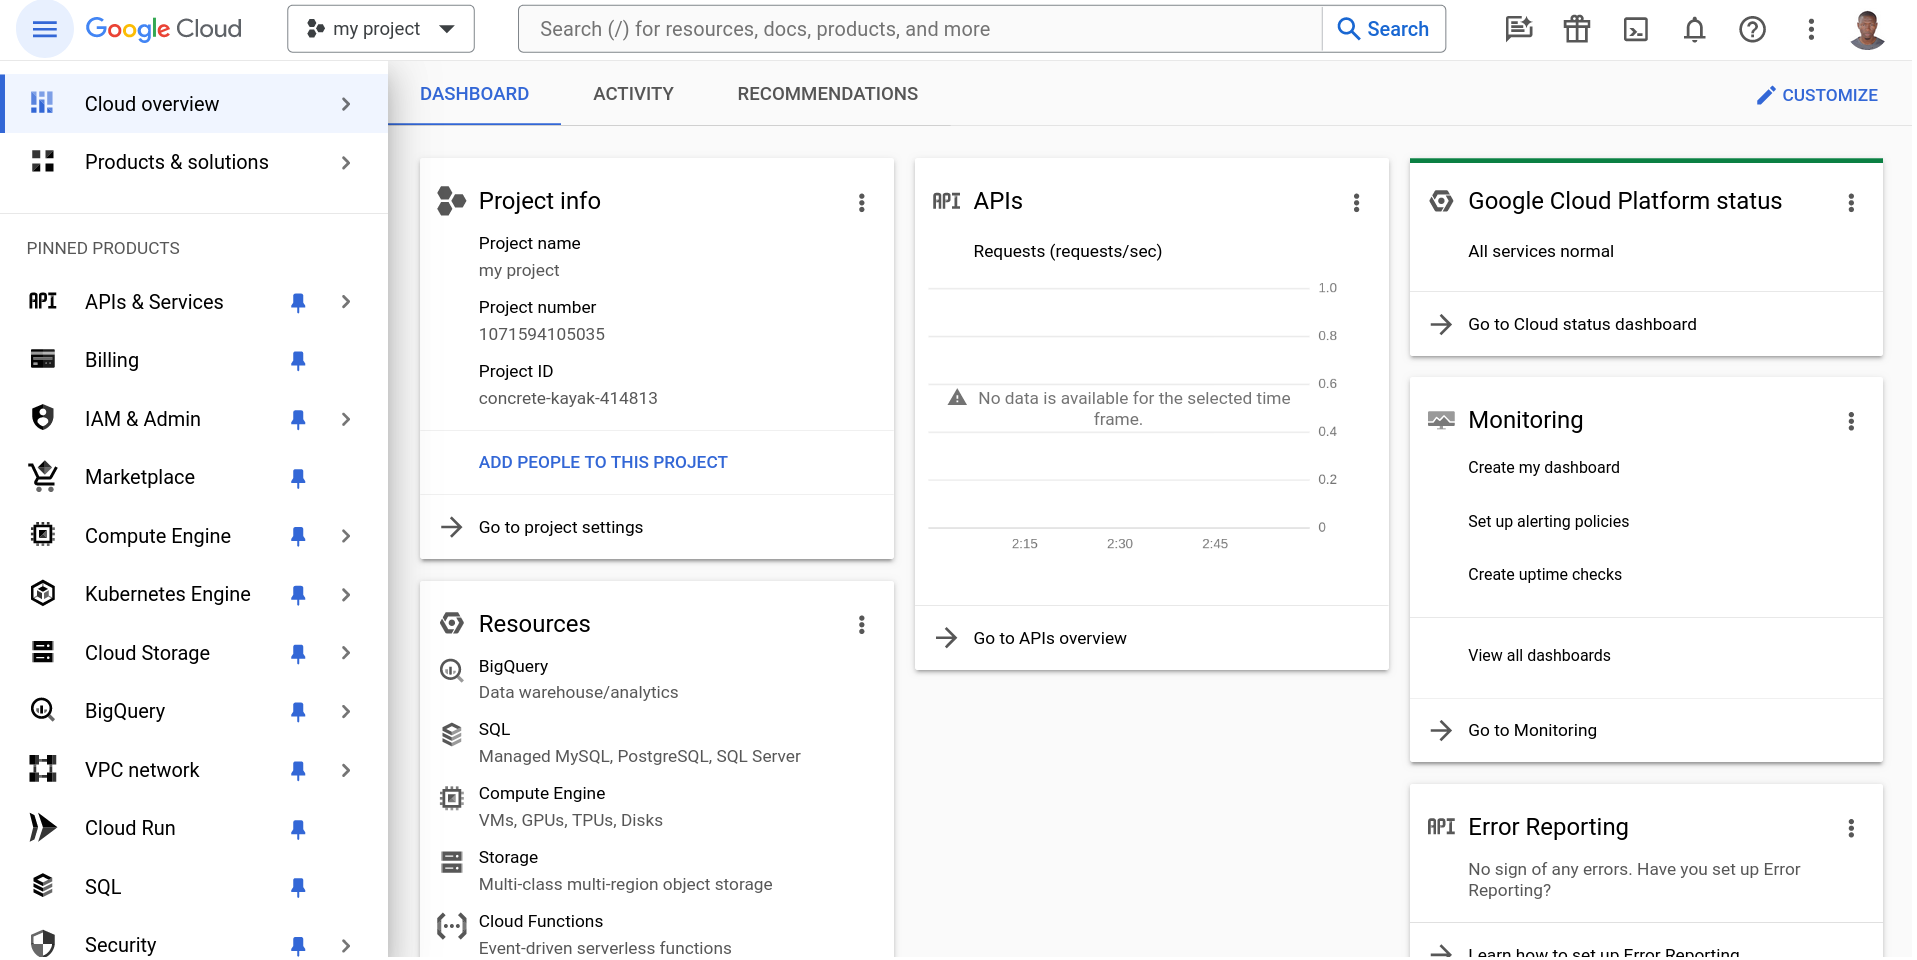
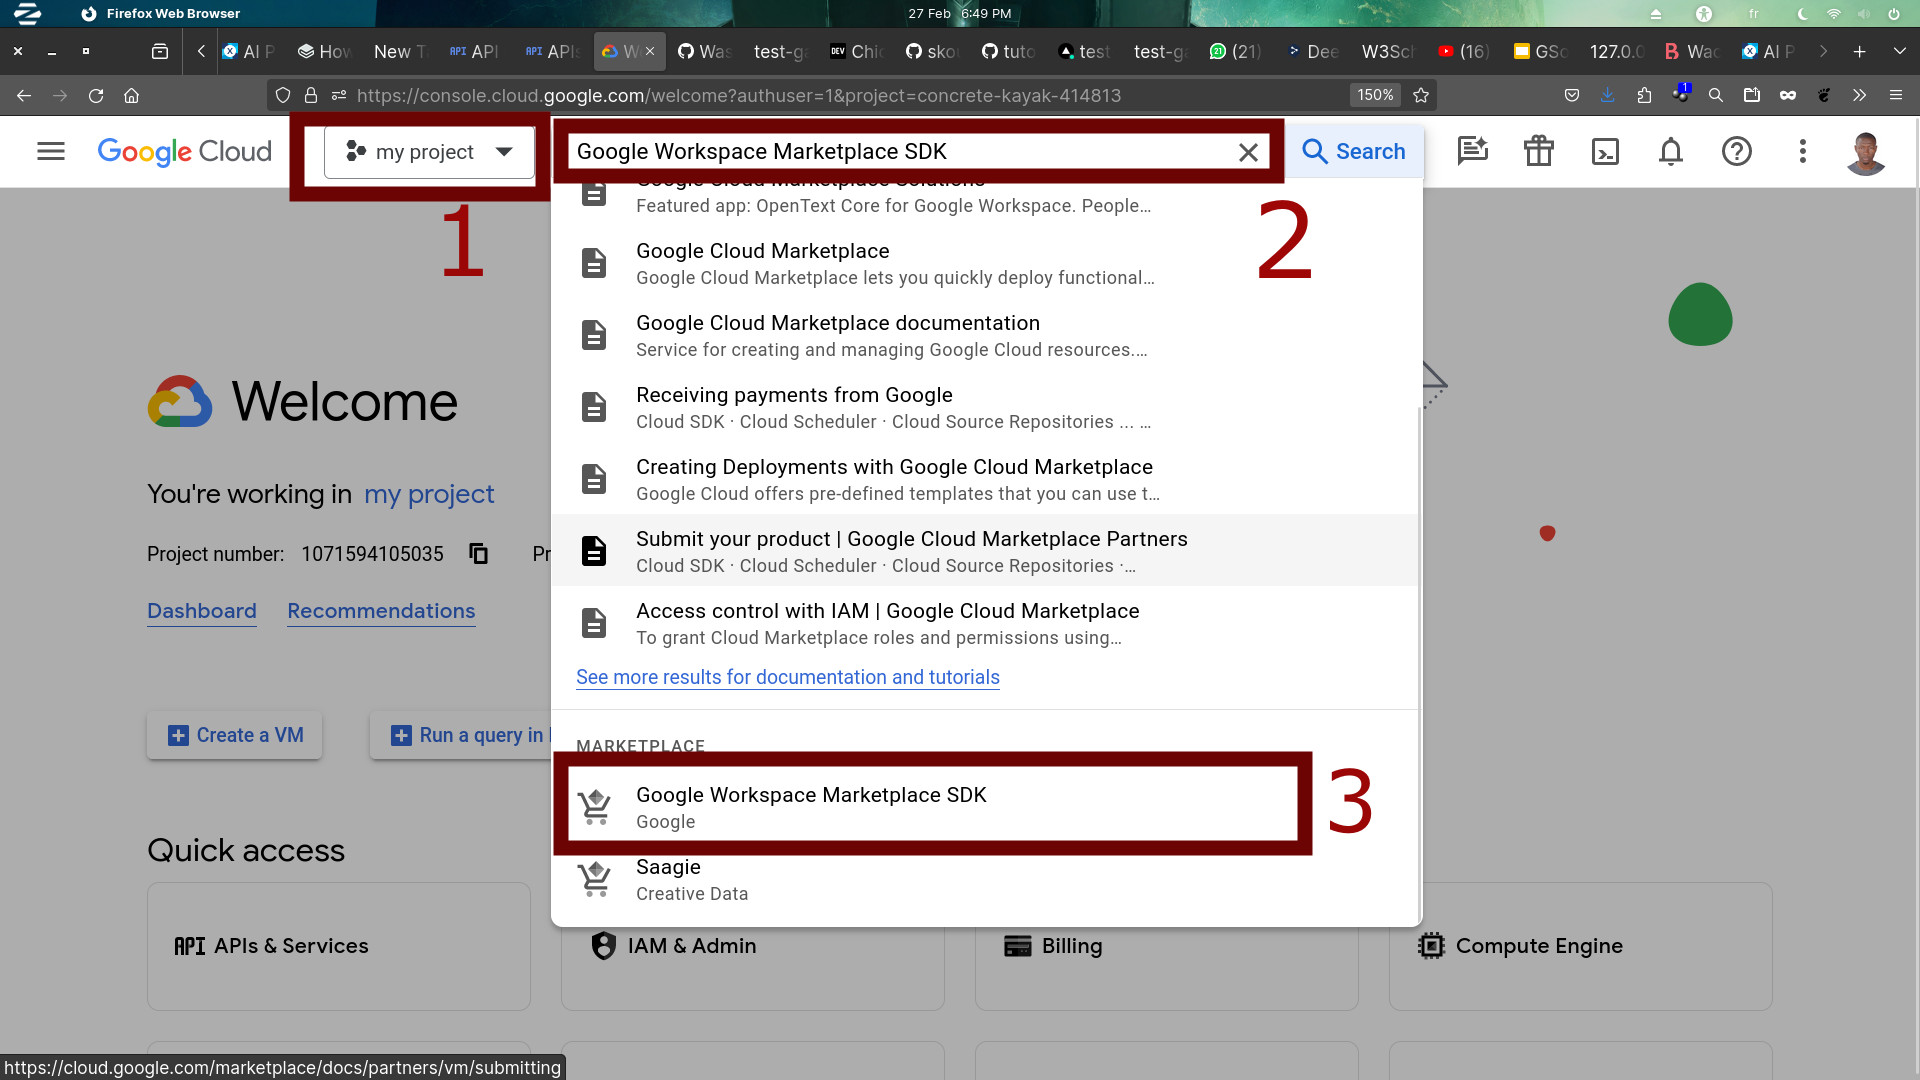
or this step we will return to our Google Cloud Console(GCC) page and login. Then choose the project we've created in the 2. Creating a standard project on the Google Cloud Platform
Type Google Workspace Marketplace SDK in the search bar and choose Google Workspace Marketplace SDK, which is at the bottom. You can see it in the image below.
Once you've clicked on Google Workspace Marketplace SDK, you'll normally see this page. On this page below, simply click on the Enable button to activate the Google Workspace Marketplace SDK.
Note: if you've already done so, you can skip this step.
.jpg?alt=media&token=0e145bdb-97db-4d20-855d-dff7abf9d555)
Our Google add-ons are developed in a language (Python) other than Appscript. This means they cannot be run in the AppScript environment, which is the default. Google has thought of this by offering alternative execution environments.
Now that everything is clear, return to our page and click on ALTERNATE RUNTIMES.
.png?alt=media&token=aac0666e-61be-41d0-a6b4-4f3722e175da)
After clicking on alternate runtimes. You will be asked to activate the Google Workspace Add-ons API. To do this, click on the ENABLE button as shown in the image below.
Note: This page will appear if you have not yet activated the Google Workspace Add-ons API.
.png?alt=media&token=560b9305-8997-4470-84a0-cc2935b1fe49)
Now that everything is activated, we're going to deploy our project on Google Workspace. To do this, click on the CREATE NEW DEPLOYMENT button, as shown in the image below.

We're going to give our deployment a name. Here, I've chosen "my_project" as the name, as you can see in the image below. You can use any name you like or that best represents your project. Note: the name must not exceed 100 characters.
Once you've chosen the name you prefer, click NEXT.

Let's fill in the DEPLOYMENT.json file. The DEPLOYMENT.json file is the manifest file for our add-ons, and will contain all the information and configurations for our application. You can see how to fill in the DEPLOYMENT.json file here ➡️ https://developers.google.com/workspace/add-ons/guides/alternate-runtimes
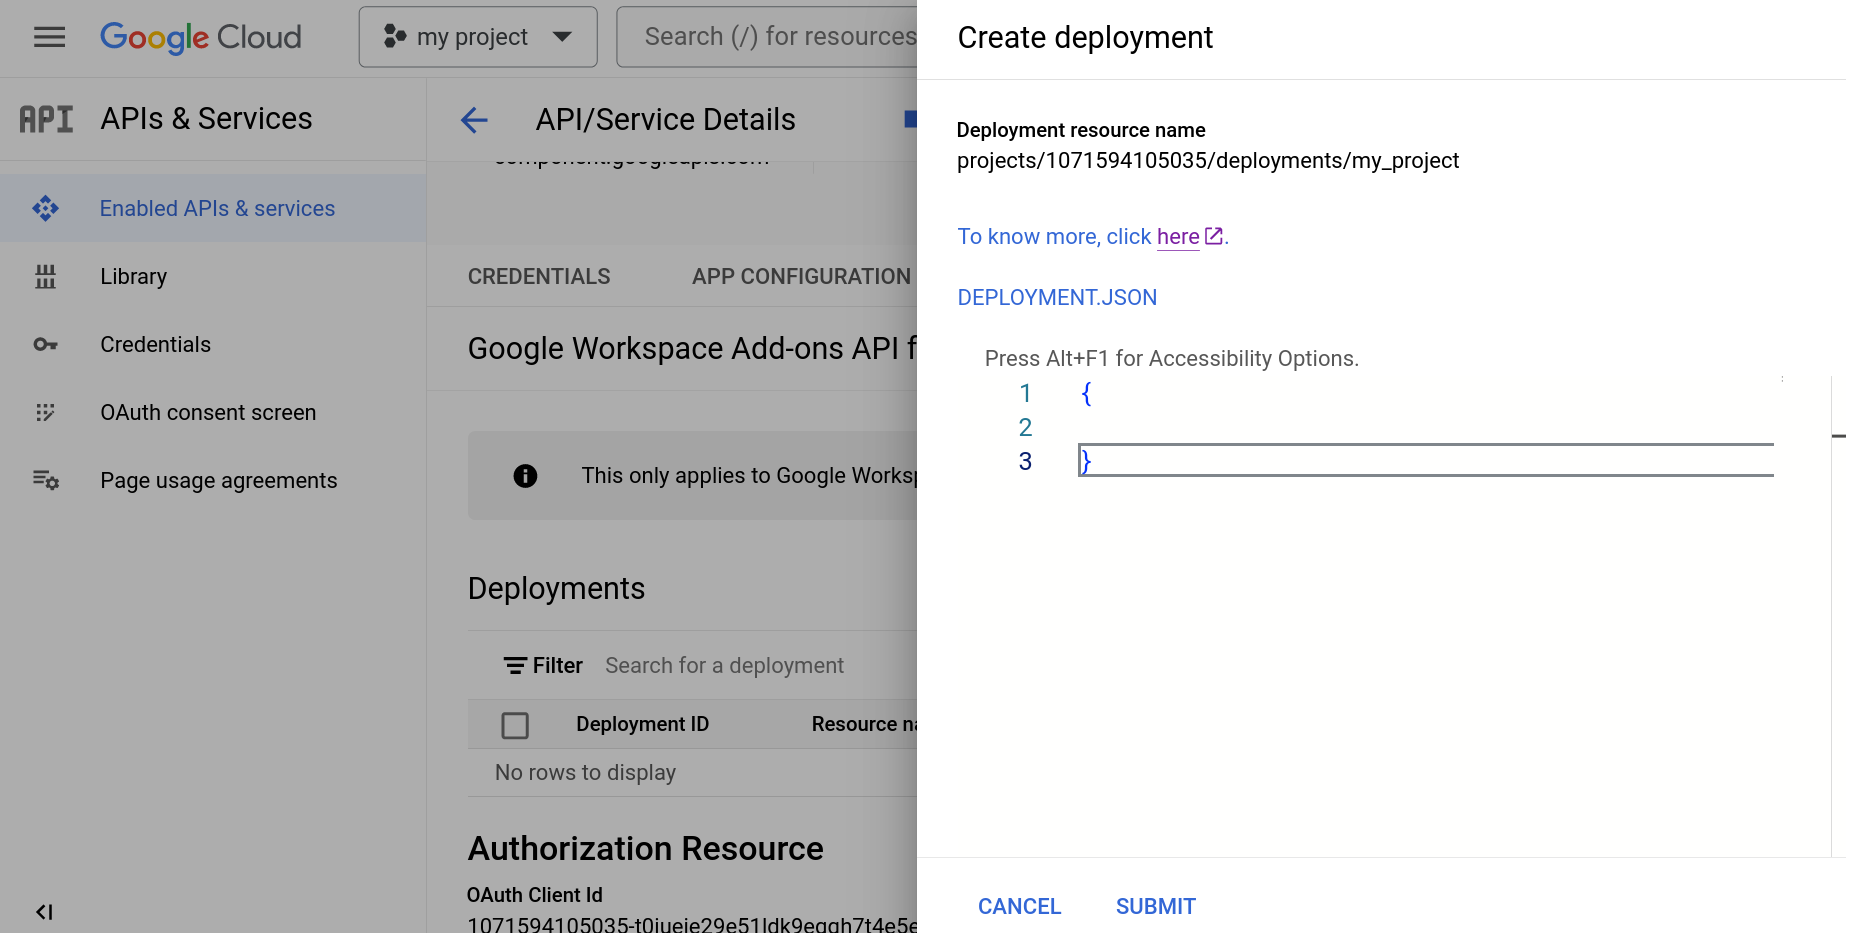
My DEPLOYMENT.JSON
{
  "oauthScopes": ["https://www.googleapis.com/auth/gmail.addons.execute", "https://www.googleapis.com/auth/gmail.readonly", "https://www.googleapis.com/auth/gmail.addons.current.action.compose", "https://www.googleapis.com/auth/gmail.addons.current.message.action", "https://www.googleapis.com/auth/gmail.addons.current.message.metadata", "https://www.googleapis.com/auth/gmail.addons.current.message.readonly", "https://www.googleapis.com/auth/calendar", "https://www.googleapis.com/auth/calendar.events", "https://www.googleapis.com/auth/calendar.addons.execute", "https://www.googleapis.com/auth/calendar.addons.current.event.read", "https://www.googleapis.com/auth/calendar.addons.current.event.write", "https://www.googleapis.com/auth/drive.addons.metadata.readonly", "https://www.googleapis.com/auth/userinfo.email", "https://www.googleapis.com/auth/script.external_request", "https://www.googleapis.com/auth/script.locale", "https://www.googleapis.com/auth/script.scriptapp", "https://www.googleapis.com/auth/drive", "https://www.googleapis.com/auth/drive.file", "https://www.googleapis.com/auth/documents.currentonly", "https://www.googleapis.com/auth/spreadsheets.currentonly", "https://www.googleapis.com/auth/spreadsheets", "https://www.googleapis.com/auth/presentations.currentonly"],
  "addOns": {
    "common": {
      "name": "test",
      "logoUrl": "https://encrypted-tbn0.gstatic.com/images?q\u003dtbn:ANd9GcT_0STptvv9XU0QffyyZhk_r1TE66fbuiys_ROAK_1ERY4EeWkZEUHfEefiMDU5FKr1ItM\u0026usqp\u003dCAU",
      "useLocaleFromApp": true,
      "homepageTrigger": {
        "runFunction": "https://test-gapps.vercel.app/homepage",
        "enabled": true
      },
      "openLinkUrlPrefixes": ["https://test-gapps.vercel.app/", "https://cataas.com"]
    },
    "gmail": {
      "contextualTriggers": [{
        "unconditional": {
        },
        "onTriggerFunction": "https://test-gapps.vercel.app/on_gmail_message"
      }],
      "composeTrigger": {
        "selectActions": [{
          "text": "Insert cat",
          "runFunction": "https://test-gapps.vercel.app/on_gmail_compose"
        }],
        "draftAccess": "NONE"
      }
    },
    "drive": {
      "homepageTrigger": {
        "runFunction": "https://test-gapps.vercel.app/homepage",
        "enabled": true
      },
      "onItemsSelectedTrigger": {
        "runFunction": "https://test-gapps.vercel.app/on_items_selected"
      }
    },
    "calendar": {
      "homepageTrigger": {
        "runFunction": "https://test-gapps.vercel.app/homepage",
        "enabled": true
      },
      "eventOpenTrigger": {
        "runFunction": "https://test-gapps.vercel.app/on_calendar_event_open"
      },
      "currentEventAccess": "READ_WRITE"
    },
    "docs": {
      "homepageTrigger": {
        "runFunction": "https://test-gapps.vercel.app/homepage"
      },
      "onFileScopeGrantedTrigger": {
        "runFunction": "https://test-gapps.vercel.app/onFileScopeGrantedEditors"
      }
    },
    "sheets": {
      "homepageTrigger": {
        "runFunction": "https://test-gapps.vercel.app/homepage"
      },
      "onFileScopeGrantedTrigger": {
        "runFunction": "https://test-gapps.vercel.app/onSheetFileScopeGrantedEditors"
      }
    },
    "slides": {
      "homepageTrigger": {
        "runFunction": "https://test-gapps.vercel.app/homepage"
      },
      "onFileScopeGrantedTrigger": {
        "runFunction": "https://test-gapps.vercel.app/onFileScopeGrantedEditors"
      }
    }
  }
}
If you've finished filling in your DEPLOYMENT.JSON, you'll get something like the image below. If all goes well, you can now click on the SUBMIT button to save our project.

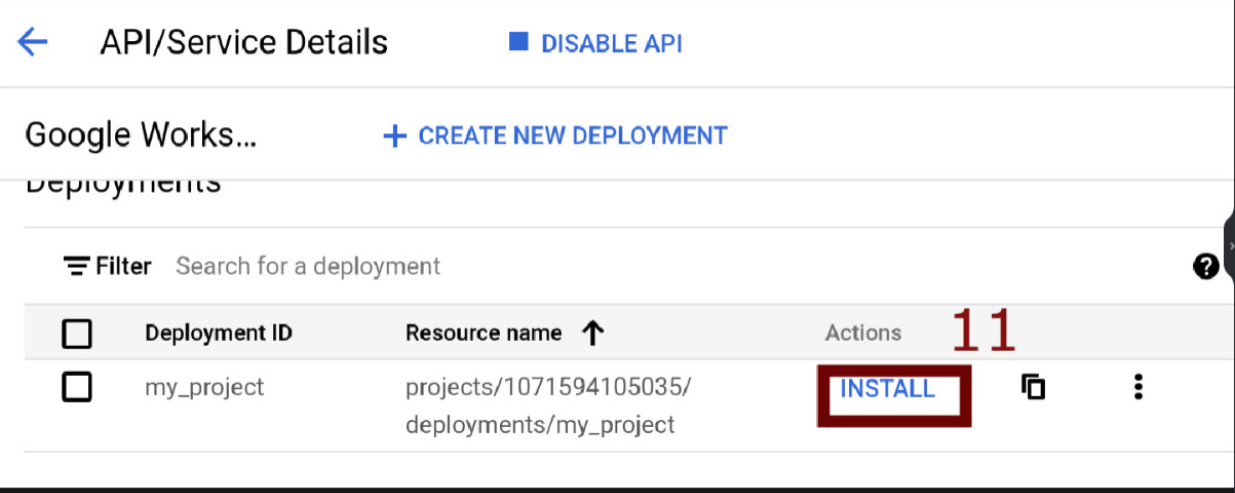
Finally, we're going to install our add-ons in our connected Gmail with the e-mail address we entered as Test Users in point 3.6 Add testers. To install it, click on the INSTALL button, as shown in the image below
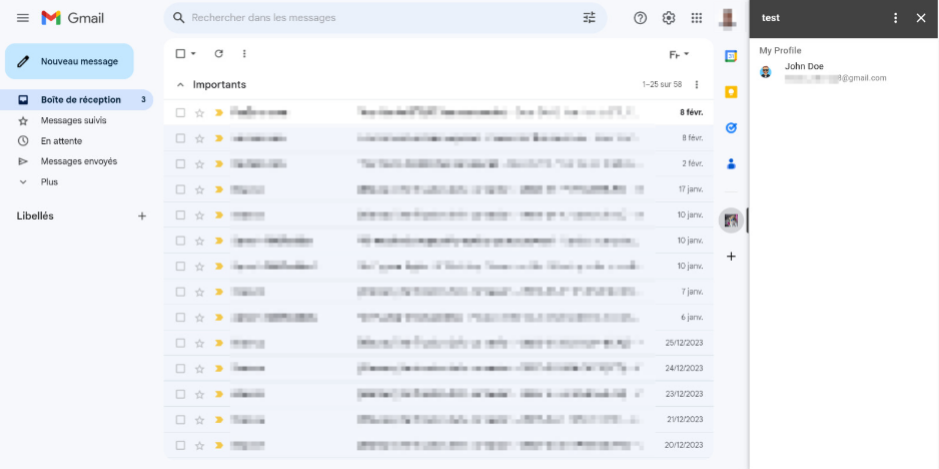
This is what my Gmail mailbox looked like before we installed our add-ons.

After clicking on the INSTALL button


Congratulations, here is the final result of our add-ons